
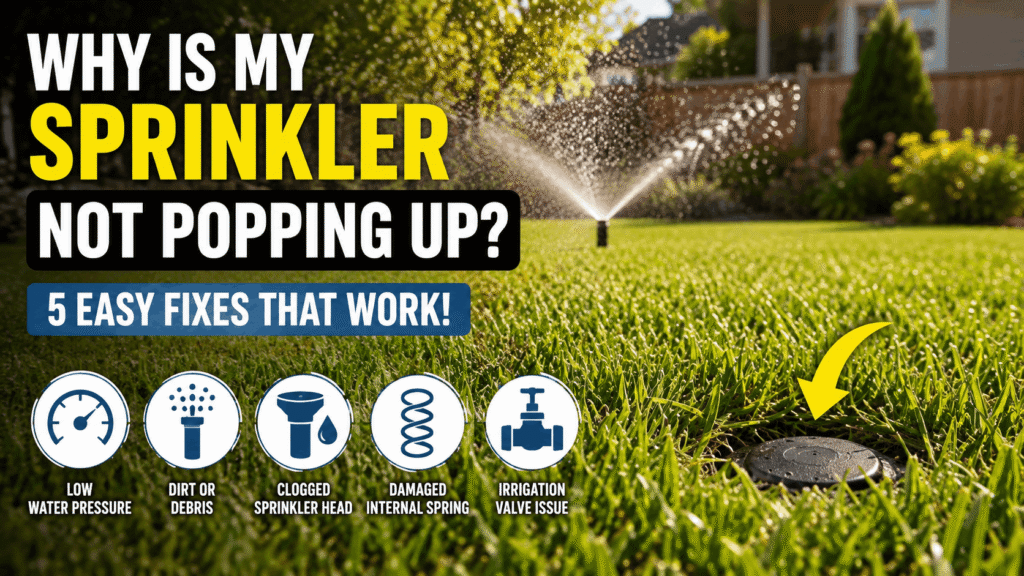
Why is my sprinkler not popping up? You turn on the irrigation system for the first watering of the week, and one sprinkler head in the back corner just sits there, flush with the grass, while every other head is spraying fine. In most cases, the problem is caused by low water pressure, dirt or debris, a clogged sprinkler head, a damaged internal spring, or an issue with the irrigation valve. Here’s how to identify the cause and fix most of these problems yourself before the day is over.
Quick Answer: A sprinkler head usually fails to pop up because of a clogged nozzle, a partially closed valve, low water pressure in that zone, a cracked riser, or a broken supply line. If only one head is affected, start by checking for debris. If a whole zone is weak or flat, check the valve and water pressure first.
Table of Contents
What You Need to Know
- One dead head almost always means debris. A whole flat zone almost always means a valve or pressure problem.
- Standard spray heads perform best around 30 PSI; rotor heads need 40–45 PSI. Below that, heads stay low or lean instead of standing straight.
- Flushing a clogged head takes under five minutes and costs nothing.
- Green or soggy patches near a head point to an underground leak, not a clog — don’t waste time flushing it.
- Cracked heads can’t be repaired. They get replaced, usually for $5–15 in parts.
Why Is My Sprinkler Not Popping Up Even With Good Water Pressure?
If your water pressure is good but one sprinkler head still refuses to pop up, the problem is usually local to that sprinkler head rather than the entire irrigation system. A pop-up sprinkler needs enough water pressure to overcome the resistance of its internal spring and rise above the ground. When pressure is available but the head stays down, dirt, grass, debris, a damaged body, or a worn internal mechanism may be preventing it from moving.
1. Check for Dirt and Debris
Grass clippings, soil, mulch, and small stones can collect around the sprinkler head and prevent the riser from moving freely. Carefully clean around the head and remove any visible debris.
If the head pops up after cleaning, you have likely found the problem.
2. Inspect the Sprinkler Head for Damage
A cracked or damaged sprinkler body can leak water around the head instead of building enough force to raise the riser. Look for cracks, broken plastic, unusual water leakage, or a head that appears tilted or sunken into the soil.
If the body is damaged, replacing the sprinkler head is usually easier than repairing it.
3. Check the Internal Spring and Riser
The pop-up riser is pushed upward by water pressure and returned underground by a spring when the system shuts off. A weak, damaged, or dirty internal spring can cause the sprinkler to remain partially raised or completely stuck underground.
With the water turned off, gently check whether the riser moves freely. Do not force it if it feels jammed.
4. Look for a Clogged Nozzle or Filter
Even when the system has good overall pressure, a clogged nozzle or small filter inside the sprinkler can restrict water flow at that individual head. Remove the nozzle according to the manufacturer’s instructions and clean away dirt or mineral deposits.
After cleaning, run the zone again and see whether the sprinkler rises normally.
5. Check for a Local Underground Leak
If the sprinkler head has good pressure at the zone but water is escaping underground near that particular head, the damaged connection or lateral pipe may be reducing the flow reaching the sprinkler.
Look for unusually wet soil, bubbling water, muddy areas, or a small depression around the sprinkler. These signs can indicate a leaking fitting or pipe.
A Simple Rule to Find the Problem Faster
If only one sprinkler head is staying underground while the other heads in the same zone work normally, start by checking the head itself. Dirt, debris, a clogged nozzle, physical damage, or a damaged internal mechanism are more likely than a whole-system pressure problem.
If several or all sprinkler heads in the same zone fail to pop up, move upstream and check the irrigation valve, zone flow, controller operation, and water pressure.
| Symptom | Most Likely Cause | Where to Start |
|---|---|---|
| One head only, rest of the zone fine | Debris clog or worn wiper seal | Flush the head |
| Whole zone weak or none rising | Partially closed valve or low pressure | Check the zone valve |
| Head seeps water even when system is off | Cracked or broken riser | Replace the head |
| Green, wet, or spongy patch near one head | Underground leak or broken lateral line | Inspect the pipe run |
| New system, heads never worked right | Design or pressure supply issue | Measure static PSI at the spigot |
Save or screenshot this table — it covers the fastest way to narrow down a sprinkler head problem before ySave or screenshot this table—it covers the fastest way to narrow down a sprinkler head problem before you dig anything up.
Cause 1: Clogged or Debris-Filled Nozzle
A single head that won’t rise, while the rest of the zone works fine, is almost always a clog. Dirt, grass clippings, or a grain of sand can wedge between the riser and the body and jam it partway down.
Fix it in under five minutes:
- Turn the affected zone on at the controller so water is actively trying to push the head up.
- Press the riser down firmly with your foot or hand, pushing it all the way back into the body.
- Release it and let it pop back up on its own.
- Repeat steps 2–3 four or five times. Each cycle flushes a little more debris out through the nozzle.
- Pull the nozzle off if the head still won’t rise after five tries, and let water run through the open riser for 10–15 seconds to force out anything left inside.
You’ll get your shoes wet doing this, so plan for it. If the head pops up cleanly once it’s clear, the fix is done and free.
Cause 2: Partially Closed Valve
If an entire zone is weak, flat, or dribbling instead of just one head, the valve feeding that zone is the next place to check—not the individual heads.
What to check, in order:
- Locate the main shutoff valve, usually near where the water line enters your yard, and confirm it’s turned fully counter-clockwise (open).
- Check the backflow preventer valves if your system has one, since these are commonly bumped or left half-closed after winterizing.
- Find the solenoid valve for the affected zone in the valve box and look for a manual bleed screw or lever. Open it slightly—if water flows strongly once the solenoid is bypassed, the electrical solenoid itself is the problem, not the water supply.
- Open the valve fully and retest the zone before assuming anything is broken.
A sprinkler system valve box with a tight-fitting lid keeps dirt and grass clippings from working their way into the valve mechanism in the first place, which is one of the more common reasons valves stop opening fully after a season or two.
Cause 3: Low Water Pressure
Even with every valve fully open, heads can stay low if the pressure reaching them is below what the head needs to fully extend and lock.
According to the Irrigation Association, standard spray nozzles perform best around 30 PSI, while rotor nozzles need 40–45 PSI to operate correctly—run either type below that range and the head will rise only partway or wobble instead of standing firm. Oklahoma State University Extension notes that residential systems ideally run between 40 and 60 PSI, and when pressure drops below that, “some of the sprinkler heads may not pop up from the ground during operation.”
How to check your pressure:
- Attach a pressure gauge to an outdoor spigot near the irrigation system’s point of connection.
- Turn the water on fully and read the static PSI.
- Compare the reading to the 30 PSI (spray) or 40–45 PSI (rotor) target for your head type.
If pressure swings high and low throughout the day—common on shared municipal lines during peak watering hours—a pressure regulator for your sprinkler system evens that out so every head gets a consistent supply instead of guessing based on what time you run the zone.
Cause 4: Cracked or Broken Sprinkler Head
A head that seeps or trickles water even when the system is completely off is usually cracked, not clogged. Lawnmowers, foot traffic, and freeze damage are the most common causes.
Cracked heads cannot be repaired—the housing itself has failed, so flushing or adjusting won’t help. Pull the old head, unscrew it from the riser, and thread on a replacement of the same PSI rating and spray pattern. Mixing spray types on one zone throws off water distribution, so match what’s already installed rather than grabbing whatever’s cheapest. If you’re shopping for replacements, this roundup of sprinkler heads for smaller lawns covers a few reliable options if your yard falls in that range.
Cause 5: Underground Leak or Broken Line
This is the cause most homeowners hope it isn’t and the one most likely to need professional help.
Signs of a buried leak near a dead head:
- A patch of grass that’s noticeably greener or lusher than the surrounding lawn, even in dry weather.
- Soft, muddy, or spongy ground along the pipe run that never fully dries out.
- A water bill that’s climbed with no change in your watering schedule.
The EPA’s WaterSense program notes that a single undetected irrigation leak can waste thousands of gallons of water over a season, which is exactly why muddy patches and rising bills are worth acting on quickly rather than assuming they’ll resolve on their own.
Common Mistakes to Avoid
- Assuming every dead head is a clog. If a head is seeping when the system is off, it’s cracked, and flushing won’t fix that.
- Skipping the pressure check. Low pressure looks identical to a clogged head from the surface—heads rise, but only halfway.
- Digging before confirming a leak. Check the water meter first (shut everything off, watch for the sweep-hand moving) so you’re not tearing up healthy turf on a hunch.
- Mixing spray and rotor heads in the same zone, which guarantees uneven pressure and uneven watering no matter how well each head is working individually.
If you’d rather catch these issues before your lawn shows the damage, our seasonal irrigation tips walk through what to check each time you switch the system on for the year—worth subscribing to if troubleshooting isn’t how you want to spend your Saturday.
When to Call a Professional
Debris clogs, valve checks, and head swaps are reasonable DIY jobs for most homeowners. Underground leaks are where it’s worth bringing in a licensed irrigation specialist, since locating a buried break without the right equipment often means digging up more lawn than the leak actually justifies, and a botched pipe repair can turn a small problem into a bigger one. If you’ve checked valves, pressure, and visible heads and a zone still won’t perform, that’s the point to make the call rather than keep guessing.
FAQ
Why do only some of my sprinkler heads not pop up? When only one or two heads in an otherwise working zone fail to rise, the cause is almost always local—debris in that specific nozzle or a worn wiper seal. The rest of the zone reaching normal heads confirms the valve and pressure are fine; it’s isolated to the affected head itself.
Why does my sprinkler head only pop up halfway? A head that partially rises but won’t fully extend usually means the water pressure reaching it is below what the head needs, often because of a partially closed valve upstream or a pressure drop across the zone. Fully open valves and a pressure test will confirm which.
Can low water pressure cause sprinklers not to pop up? Yes. Spray heads need around 30 PSI and rotors need 40–45 PSI to rise and lock properly. Below those ranges, heads stay low, lean, or retract early instead of standing upright for the full watering cycle.
How do I find a leak in my sprinkler line? Shut off every water source in and around the house, then check the water meter’s sweep hand—if it’s still moving, water is running somewhere. Green, soggy, or unusually lush patches along the pipe run typically mark the general leak location.
Can a broken sprinkler head be repaired, or does it need replacing? Cracked or broken sprinkler heads cannot be repaired. The housing itself has failed, so the only fix is unscrewing the damaged head from the riser and threading on a new one that matches the existing PSI rating and spray pattern.
How long does it take to fix a clogged sprinkler head? Flushing a clogged head by pressing the riser down and releasing it four or five times typically takes under five minutes and costs nothing, since it just clears debris rather than requiring any replacement parts.
What to Do Next
Once the zone is popping up correctly again, two things are worth doing before you close this out. If pressure swings were part of the problem, look at a pressure regulator for your sprinkler system so it doesn’t come back next season. And if the issue turned out to be uneven coverage rather than a dead head, our guide on how to adjust Rain Bird sprinkler heads is the natural next step for dry spots and overspray.
Helpful Irrigation Resources
For additional information about sprinkler pressure, irrigation performance, and water conservation, these authoritative resources are useful:
- Irrigation Association: Learn how pressure-regulating spray heads help maintain proper sprinkler pressure and improve watering uniformity. Pressure-Regulating Spray Heads – Irrigation Association
- Oklahoma State University Extension: Learn how water pressure affects sprinkler heads and why low pressure can prevent some sprinkler heads from popping up properly. Managing Pressure in the Home Irrigation System – Oklahoma State University Extension
- EPA WaterSense: Learn about irrigation leaks, broken sprinkler heads, and ways to reduce outdoor water waste. Sprinkler Spruce-Up – EPA WaterSense