
Introduction
If you’re installing or repairing a sprinkler system for your lawn or garden, understanding valves for sprinkler system setups is essential. Valves are the component that decides when, where, and how much water flows through your irrigation network. In a well-designed irrigation system, valves are just as important as the sprinkler heads themselves because if a valve doesn’t function properly, the entire system becomes inefficient, your water bill goes up, and your lawn doesn’t get the watering it actually needs.
In this guide, we’ll cover every valve type, how each one works, installation, maintenance, and how to choose the right valve – so homeowners across the USA can make a better decision for their irrigation setup.
If you’ve already installed your sprinkler system or are planning to, check out our guide: How to Install a Sprinkler System.
Table of Contents
What Role Do Valves Play in a Sprinkler System?
A sprinkler valve is a control device that manages water flow from the main supply line to different zones. Most lawns and gardens are divided into multiple “zones”—front yard, backyard, flower beds, and so on—and each zone typically has its own dedicated valve. When the controller or timer sends a signal, the valve opens and delivers water to that specific zone, while the other zones remain off.
Without valves, the entire system would turn on and off all at once, leading to water waste and uneven watering. Some zones would end up overwatered while others stay underwatered, which isn’t good for your lawn’s health.
Why Are Valves Important?
- Independently controlling different lawn zones
- Managing water pressure so every sprinkler head performs evenly
- Preventing water waste and lowering your monthly water bill
- Extending the lifespan of the system by distributing pressure evenly
- Backflow prevention (stopping contaminated water from re-entering the clean water supply)
How Does a Valve Actually Work?
Most residential systems use a diaphragm or piston mechanism that opens and closes via an electric signal (solenoid) or manual force. When the controller sends an electric current, the solenoid plunger moves, the diaphragm lifts, and water begins flowing to the zone. Once the signal stops, the diaphragm closes again, shutting off the flow.
Types of Sprinkler System Valves
There are several types of valves on the market, and each has its own specific use case. Below, we break down the most common ones in detail.
1. Electric Solenoid Valves
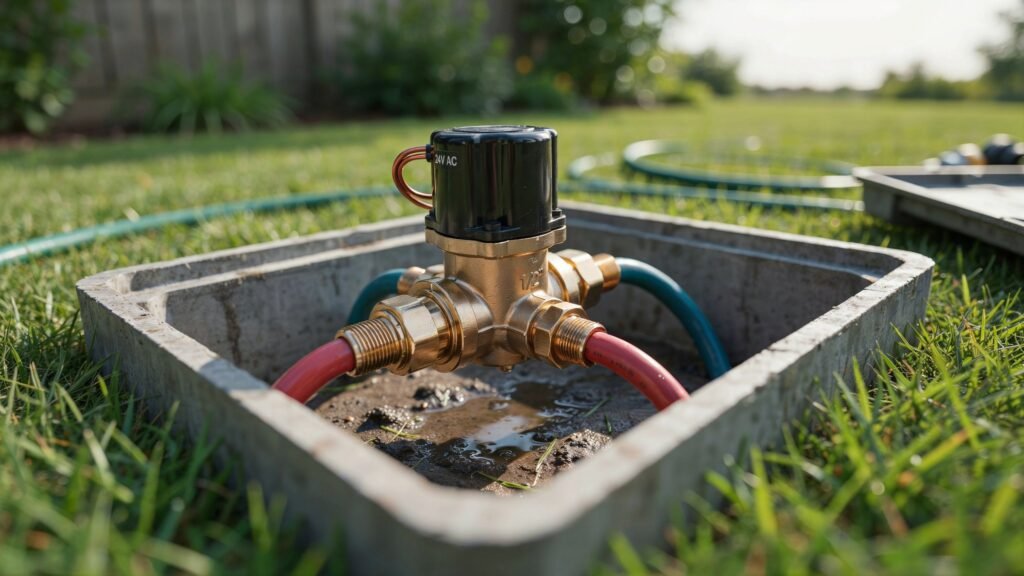
This is the most common valve type used in automatic sprinkler systems. They connect to a controller/timer and open or close when they receive an electric signal. The wiring for these valves runs underground to a controller box, where you can set your watering schedule.
Best for: Automated in-ground sprinkler systems with multiple zones where you don’t want to manually operate each valve.
Benefit: Consistency, scheduling flexibility, and remote control (when paired with smart controllers).
2. Anti-Syphon Valves
These valves are used for backflow prevention, meaning irrigation water can’t flow back into the clean water supply. In many US states, these are legally required, especially when the irrigation system connects directly to the home’s main water line.
Best for: Homes where local codes require backflow prevention, or where the irrigation system connects directly to potable water.
Important note: Anti-syphon valves must always be installed above the sprinkler heads — we’ll cover this in more detail in the installation section below.
3. Ball Valves
Manual valves operated by hand. Mostly used at the main shut-off point to control the entire system.
Best for: Main water line control, emergency shut-off, and draining the system before winterisation.
4. Gate Valves
Also manual, but better suited for gradually controlling flow, although long-term use comes with a higher risk of leakage and wear since the internal mechanism can corrode over time.
Best for: Older systems, gradual flow adjustment, or situations where you need precise flow rate control.
5. Diaphragm Valves
These perform reliably even in low water pressure situations and are common in commercial-grade irrigation systems. They contain a rubber diaphragm that smoothly controls flow and are more resistant to clogging.
Best for: Larger properties, commercial landscaping, or high-debris water sources (like well water).
6. Check Valves (Bonus Type)
Some homeowners overlook these, but check valves are important too — they only let water flow in one direction, which prevents low-head drainage (water dripping from sprinkler heads after shutoff).
Best for: Sloped yards where gravity causes water to keep dripping from heads even after the system shuts off.
How to Choose the Right Valve
Choosing a valve should not solely be based on price; there are several factors that influence there are several factors that affect your decision.
Consider Zone Size and Water Pressure
If your zones are large or your water pressure is low, diaphragm or solenoid valves perform better since they provide consistent flow even when pressure fluctuates.
Material Quality
PVC and brass valves are the most durable and can handle US weather conditions, including freeze-thaw cycles. Plastic valves are cheaper but can crack in extreme cold, so if you live in northern states (like Minnesota or Michigan), brass or heavy-duty PVC is a better choice.
Flow Rate and GPM Compatibility
Every valve has its own GPM (Gallons Per Minute) rating. Calculate your sprinkler heads’ total GPM requirement and choose a valve that can comfortably handle that load.
Local Building Codes
Every US state has its own irrigation code, especially regarding backflow prevention. For more details, check the Irrigation Association’s official site (external link — authority source), which provides comprehensive information on irrigation standards and certifications.
If you’re dealing with water pressure issues at home, our article on this topic will help too: sprinkler pressure regulators
Valve Installation Tips
Small details in the installation process can make a big difference. Here are some important tips:
- Install a separate valve for each zone — this lets you control and troubleshoot independently.
- Use a valve box to protect the valve underground from dirt, debris, and weather.
- Install anti-syphon valves at least 6 inches above sprinkler heads — this is a code requirement for backflow prevention.
- Use Teflon tape on pipe connections to prevent leaks, especially on threaded fittings.
- Join wiring with waterproof connectors so underground moisture doesn’t cause a short circuit.
- Plan your manifold layout if grouping multiple valves in one place — this makes maintenance easier.
Valve Box Placement Tips
Place the valve box somewhere that’s easy to access but also visually acceptable — most homeowners place it along the edge of flower beds or near a fence.
Common Valve Problems and Solutions
Valves can develop a few common issues over time. Here’s how to solve them.
Valve Is Leaking
The diaphragm or seal may be worn out — replacing it is usually cheap and easy. Most manufacturers also sell rebuild kits that repair the valve without needing a full replacement.
Valve Won’t Open or Close
Check the solenoid coil, or check the wiring connection to the controller. Testing voltage with a multimeter can tell you whether the fault is electrical or mechanical.
Low Water Pressure in One Zone
This can be caused by debris inside the valve or a partially closed valve. Disassembling the valve and cleaning the internal filter screen usually resolves this issue.
Valve Making Noise (Water Hammer)
If you hear a loud bang when the valve closes, this is called “water hammer”, caused by a sudden pressure change. The solution is to use slow-closing valves or install air chambers.
If you’re using Rain Bird heads and having adjustment issues, check out our guide: Rain Bird Sprinkler Head Adjustment Guide (internal link).
Seasonal Valve Maintenance Tips
H3: What to Do in Spring
Before starting up the system, manually test each valve to make sure it opens and closes properly.
H3: What to Do in Summer
Regularly check that no valve has got stuck, especially during high-usage months when the system runs daily.
What to Do in Fall/Winter
In cold regions, winterising your valves is essential — drain the water to prevent freeze damage. Ball valves come in handy for this process at the main shut-off point.
Conclusion
Choosing the right valves for your sprinkler system has a direct impact on your lawn’s health, water efficiency, and the overall lifespan of your irrigation setup. Whether you go with an electric solenoid valve, an anti-siphon valve, or a diaphragm valve, what matters most is making your decision based on your zone size, water pressure, and local building codes.
With regular maintenance and timely troubleshooting, you can keep your irrigation system running efficiently for years, lower your water bill, and keep your lawn healthy. Whether you’re installing a new sprinkler system or upgrading your existing valves, following the tips above will help you make a confident, informed decision.
If you need help at any stage of this process — from installation to maintenance — be sure to check out our other guides so your entire irrigation system runs smoothly.
FAQs
Q1: How many valves should a sprinkler system have?
This depends on the number of zones — each zone should have its own separate valve. An average residential lawn usually has 4-6 zones and an equal number of valves.
Q2: Can valves be installed by me (DIY)?
Yes, DIY installation is possible with basic plumbing knowledge, but it’s important to check local codes for backflow prevention valves to meet legal requirements.
Q3: What’s the average lifespan of a sprinkler valve?
It depends on quality and maintenance, but generally they last 8-10 years. Brass valves can last even longer with regular maintenance.
Q4: Is an anti-syphon valve required or optional?
In many US states, it’s legally mandatory for backflow prevention — confirm with your local water authority. EPA WaterSense (https://www.epa.gov/watersense) also provides guidance on this (external link).
Q5: When is the right time to replace a valve?
If a valve is leaking frequently, not closing properly, or has repeated wiring issues, replacement is a better option than repair.
Q6: Should all valves be from the same manufacturer?
Not necessarily, but using the same brand makes compatibility and troubleshooting easier, especially when replacing parts.