
Introduction
Thinking about installing a sprinkler system in your yard? You are making a smart choice. A well-designed irrigation setup keeps your lawn lush, saves water, and cuts down on the time you spend dragging hoses around every week. The good news is that installing a sprinkler system is a project many homeowners can tackle on their own with a bit of planning, the right tools, and a clear process to follow.
In this guide, we walk you through everything — from mapping out your yard and understanding water pressure to laying pipes, installing heads, and setting your timer. Whether you have a small backyard or a large property with multiple zones, this walkthrough will help you get the job done right the first time.
Table of Contents
Why Installing a Sprinkler System Is Worth It
Before getting into the how, it helps to understand the why. A permanent in-ground sprinkler system offers several real advantages over portable sprinklers or hand watering:
- Consistent coverage: Water reaches every corner of your lawn on a regular schedule, even when you are on vacation.
- Water efficiency: Modern systems use far less water than traditional methods because they deliver moisture directly at the root zone.
- Property value: A properly installed irrigation system can increase your home’s resale value.
- Time savings: Once programmed, the system runs itself without you lifting a finger.
- Healthier lawn: Uniform watering prevents dry patches, fungal growth from overwatering, and runoff waste.
What You Need Before You Start
Good preparation is what separates a clean installation from a frustrating one. Here is what to gather and check before you dig a single inch of soil.
Tools and Materials
- Pipe trencher or flat spade shovel
- PVC pipe cutter or hacksaw
- Pipe glue and primer
- Measuring tape and marking paint or flags
- Backflow preventer
- Sprinkler heads (rotary or fixed, depending on zone type)
- Irrigation controller / timer
- Poly or PVC pipe (typically 1-inch main line, 3/4-inch lateral lines)
- Pipe fittings: elbows, tees, couplings
- Wire connectors and irrigation wire (for electric valves)
- Manifold and zone valves
- Pressure gauge
Check local codes and call 811.
Before breaking ground, call 811 — the national “Call Before You Dig” number in the United States. This free service will mark the location of underground utility lines (gas, electric, water, and cable) on your property. Hitting one of these lines is dangerous and expensive. Also check with your local municipality about permits; some areas require a permit for irrigation work tied to the main water supply.
Step 1 — Measure Your Water Pressure and Flow Rate
Every sprinkler system design starts with two numbers: your static water pressure (measured in PSI) and your flow rate (measured in GPM — gallons per minute). These numbers determine how many sprinkler heads you can run per zone and what pipe size you need.
To measure static pressure, attach a pressure gauge to an outdoor hose bib with all other water off inside the house. A reading between 40 and 65 PSI is ideal for most residential systems. If your pressure is higher than 80 PSI, you will need a pressure regulator to protect your heads and pipes.
To measure flow rate, time how long it takes to fill a one-gallon bucket from that same hose bib, then convert to GPM. For example, if it takes 10 seconds to fill a gallon, your flow rate is 6 GPM. This number caps how many heads you can put on a single zone.
Pro tip: If you are dealing with low water pressure and want to fix it before installing your system, read our guide on how to increase sprinkler water pressure before moving forward.
Step 2 — Design Your Irrigation Layout and Zones
On graph paper or a free online tool, draw your yard to scale. Mark the house, driveway, flowerbeds, trees, and any obstacles. Then identify the different watering zones your yard needs.
Zones separate areas with different water needs. For example, a sunny front lawn, a shaded back lawn, and a drip-irrigated flowerbed should never share a zone because they require different amounts of water and different head types.
Types of Sprinkler Heads by Zone
- Rotary heads (gear-driven): Best for large open lawn areas. They rotate and throw water up to 35 feet.
- Fixed spray heads: Great for smaller lawn areas and groundcover beds. They pop up and spray in a fixed pattern.
- Drip emitters: Used in flowerbeds, shrub areas, and vegetable gardens. They deliver water slowly at the root.
- Rotor heads: Mid-range option for medium-size turf areas.
When laying out heads, use the “head-to-head coverage” rule: each head should reach the next one. This ensures no dry spots in between. Mark head locations on your map with a symbol showing the spray pattern (quarter circle, half circle, or full circle).
Step 3 — Connect to the Water Supply and Install a Backflow Preventer
Your irrigation system ties into your home’s main water supply line, typically near the water meter or where the line enters the house. You will cut into the pipe and install a tee fitting that branches off to your sprinkler system.
This is also where you install the backflow preventer—and this step is not optional. A backflow preventer stops contaminated water from flowing backward into your drinking water supply. In most U.S. states, a backflow preventer is required by code whenever an irrigation system connects to a potable water line. Common types include the pressure vacuum breaker (PVB) and the reduced pressure zone (RPZ) valve.
Note: If you have a wet pipe fire suppression system in your home, be aware that your sprinkler plumbing is a separate system entirely. You can learn more about the wet-pipe sprinkler system if you want to understand how they differ.
Step 4 — Install Zone Valves and the Manifold
Zone valves control the water flow to each section of your yard. Each zone gets its own valve, and all of them are grouped together in a manifold—a compact assembly that is usually installed in a covered valve box buried at the edge of your yard or near the water source.
Use solenoid valves (electrically operated) if you are installing an automatic system with a controller. Each valve has two wires: one connects to the controller’s common terminal and the other to the zone terminal. Use waterproof wire connectors for all underground connections.
Install the valves with the flow arrow pointing in the direction water travels (away from the supply). Hand-tighten fittings, then use pipe wrenches carefully—overtightening can crack valve bodies.
Step 5 — Dig the Trenches
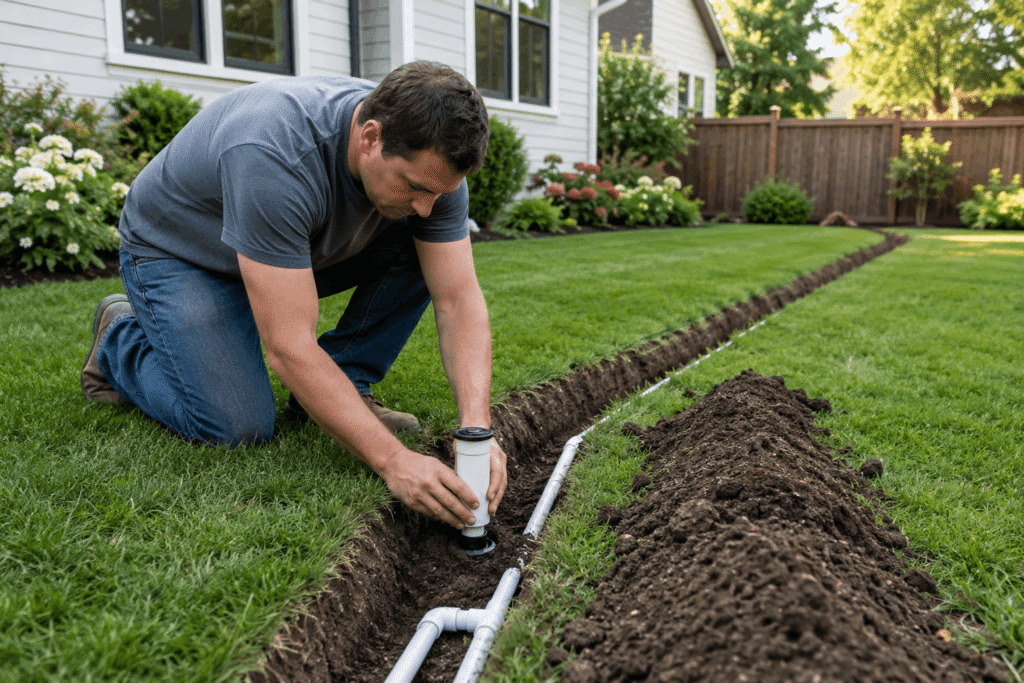
Trenching is the most labor-intensive part of the job. You can rent a mechanical pipe trencher from any major equipment rental store — this is strongly recommended for anything beyond a very small yard. A trencher can cut through grass and soil in a narrow slot without tearing up large sections of your lawn.
Trench depth varies by climate. In warmer regions that do not freeze, 6 to 8 inches is sufficient. In colder climates—like the Midwest or Northeast—you may need to go 12 inches or more to get below the frost line. Check your local frost depth before digging.
For homeowners in colder states planning irrigation projects, see our detailed guide on irrigation system installation in Minneapolis, which covers frost depth, winterization, and freeze protection in detail.
Mark your trench lines with spray paint or string before you dig. Follow the layout map you created in Step 2. Avoid running main lines under concrete or pavement if possible—if you must cross a driveway, you can drive a rigid steel pipe under it using a technique called “boring” rather than tearing up the surface.
Step 6—Lay the pipe and connect the fittings.
Once your trenches are open, it is time to lay pipe. The main supply line running from the manifold to each zone is typically 1-inch PVC or polyethylene pipe. Lateral lines branching off to individual sprinkler heads are usually 3/4-inch.
PVC vs. Poly Pipe
PVC pipe is rigid, durable, and handles high pressure well. It is glued together with PVC cement and primer. It is the standard choice in most parts of the country.
Polyethylene (poly) pipe is flexible, making it easier to snake around obstacles and work in cold weather without cracking. It connects with barbed fittings and clamps. It is common in northern states.
When gluing PVC, apply primer to both the pipe and the fitting, then apply cement quickly and push the pieces together with a slight twist. Hold for 30 seconds. Wait at least 30 minutes before pressurizing the line.
Use tee fittings at each sprinkler head location. Risers — short vertical pipe sections — connect the lateral line to the sprinkler head at the surface. Use flexible swing-joint risers when possible; they absorb impacts from foot traffic and mowing and prevent the head from breaking if it gets bumped.
Step 7 — Install the Sprinkler Heads
Thread or push-connect each sprinkler head onto its riser. Pop-up heads should sit at grade level — the top of the head flush with the soil surface. This protects them from mowing damage and ensures they pop up correctly when the zone runs.
After installation, you will likely need to adjust the arc and radius on each head to match your layout. Most rotary and spray heads have a built-in adjustment screw on top and a radius adjustment on the nozzle itself.
For a detailed walkthrough on setting the spray pattern correctly, read our guide on Rain Bird sprinkler head adjustment.
Step 8 — Install the Irrigation Controller
The irrigation controller (also called the timer or clock) is the brain of your system. It tells each valve when to open, for how long, and how many times per week. Mount the controller inside the garage or in a weatherproof outdoor enclosure, close to an electrical outlet.
Run irrigation wire from the controller to the valve manifold. Each valve connects to its own numbered terminal on the controller, plus a shared “common” wire that connects all valves together. Standard irrigation wire is 18-gauge direct-burial cable.
Modern controllers offer Wi-Fi connectivity, smart scheduling based on local weather data, and app control. Brands like Rain Bird, Hunter, and Rachio make solid options for residential use. A smart controller can save significant water by automatically skipping scheduled runs after rainfall.
According to the EPA’s WaterSense program, switching to a smart irrigation controller can save the average household about 8,800 gallons of water per year.
You can learn more about water-efficient irrigation at the EPA WaterSense program.
Step 9 — Backfill, Test, and Adjust
Before covering your trenches, do a full system test. Turn on each zone from the controller and walk the area. Watch for:
- Leaks at pipe joints or fittings
- Heads that are misaligned, tilted, or spraying onto pavement
- Dry spots that are not being reached by any head
- Puddling or runoff in any area (a sign of too much overlap or poor soil absorption)
- Heads that are not popping up fully (often a pressure issue)
Fix any issues before backfilling. Once you are satisfied with coverage and there are no leaks, carefully push the excavated soil back into the trenches and tamp it down gently. Water the area thoroughly to help the soil settle. Your lawn will recover within a couple of weeks.
Step 10 — Program Your Watering Schedule
With the system running and tested, set up your watering schedule on the controller. A few general rules for U.S. homeowners:
- Water in the early morning (4 AM to 8 AM) — this reduces evaporation and gives the grass time to dry before evening, which prevents fungal disease.
- Most lawns need about 1 to 1.5 inches of water per week, including rainfall.
- Divide the total watering time across two or three days rather than one long session—this allows water to soak in instead of running off.
- Use shorter, more frequent cycles on slopes to prevent runoff.
- Adjust your schedule seasonally — more in summer heat, less in spring and fall.
Seasonal Maintenance Tips
A sprinkler system is not a set-it-and-forget-it investment. A little seasonal maintenance keeps it running efficiently for years.
Spring Startup
- Inspect heads for winter damage or settling
- Check valve boxes for debris or pest nests
- Slowly pressurize the system—do not open the main valve all at once.
- Run each zone manually and inspect coverage
Fall Winterization (Critical in Freezing Climates)
In states where temperatures drop below 32°F, you must blow out the system with an air compressor before the first hard freeze. Attach the compressor to the blow-out port (if your system has one) or a hose bib and run each zone for 1 to 2 minutes until no water comes out of the heads. Do not skip this step — water left in pipes will freeze, expand, and crack your pipes and heads.
For region-specific watering guidance, the University of Minnesota Extension’s lawn watering guide is an excellent resource for northern homeowners.
Common Mistakes to Avoid
- Skipping the water pressure test: Designing a system without knowing your actual PSI leads to either underperforming heads or blown fittings.
- Mixing head types on one zone: Rotary heads and fixed spray heads have very different precipitation rates. Mixing them creates uneven watering.
- Not calling 811: Digging without marking utilities is dangerous and potentially expensive.
- Poor head placement: Heads too far apart create dry spots. Always use head-to-head spacing.
- Ignoring soil type: Sandy soil drains fast and needs more frequent, shorter watering cycles. Clay soil absorbs slowly and can puddle easily.
- No backflow preventer: In most U.S. municipalities, this is a code requirement — and it protects your family’s drinking water.
Final Thoughts on Installing a Sprinkler System
Installing a sprinkler system is one of the most rewarding home improvement projects you can do for your yard. Once you complete it, you never have to think about watering again—the system takes care of it automatically, rain sensor and all. The upfront work pays off in a consistently green lawn, lower water bills, and time back in your schedule.
Take the process one step at a time. Start with your pressure and flow numbers, design your zones carefully, and do not rush the testing phase. If you hit any issues along the way—whether it is low pressure, misfiring heads, or a zone not triggering—most problems have straightforward fixes once you know what to look for.
Have questions about a specific part of your setup? Browse the rest of HydroSprinkler.com for more guides, tips, and troubleshooting help built specifically for U.S. homeowners.
Frequently Asked Questions
How long does it take to install a sprinkler system?
For an average-sized yard (5,000 to 10,000 square feet), a DIY installation typically takes one to three weekends, depending on your experience and the complexity of the layout. Renting a mechanical trencher significantly cuts down digging time.
How much does it cost to install a sprinkler system yourself?
DIY installation typically costs between $500 and $1,500 for materials on a standard residential lawn, compared to $2,500 to $5,000+ for professional installation. Costs vary based on yard size, number of zones, and the quality of heads and controllers you choose.
Do I need a permit to install a sprinkler system?
Permit requirements vary by city and county. Many U.S. municipalities require a permit when tapping into a potable water main. Contact your local building department before starting to confirm what is required in your area.
How many zones does my yard need?
The number of zones depends on your yard’s square footage, water pressure, and the different plant types in your landscape. A typical residential yard of 5,000 to 8,000 square feet might need three to five zones. Larger properties or yards with mixed plant types (lawn, shrubs, flowers) will need more.
Can I install a sprinkler system without digging up my whole lawn?
Mostly, yes. A mechanical trencher creates a narrow slot that closes back up well after backfilling. Within a few weeks of watering, the grass fully grows back over the trench line, and you cannot tell it was disturbed. Avoid installing in peak summer heat when the lawn is already stressed.
Thinking about installing a sprinkler system in your yard? You are making a smart choice. A well-designed irrigation setup keeps your lawn lush, saves water, and cuts down on the time you spend dragging hoses around every week. The good news is that installing a sprinkler system is a project many homeowners can tackle on their own with a bit of planning, the right tools, and a clear process to follow.
In this guide, we walk you through everything — from mapping out your yard and understanding water pressure to laying pipes, installing heads, and setting your timer. Whether you have a small backyard or a large property with multiple zones, this walkthrough will help you get the job done right the first time.
Why Installing a Sprinkler System Is Worth It
Before getting into the how, it helps to understand the why. A permanent in-ground sprinkler system offers several real advantages over portable sprinklers or hand watering:
- Consistent coverage: Water reaches every corner of your lawn on a regular schedule, even when you are on vacation.
- Water efficiency: Modern systems use far less water than traditional methods because they deliver moisture directly at the root zone.
- Property value: A properly installed irrigation system can increase your home’s resale value.
- Time savings: Once programmed, the system runs itself without you lifting a finger.
- Healthier lawn: Uniform watering prevents dry patches, fungal growth from overwatering, and runoff waste.
What You Need Before You Start
Good preparation is what separates a clean installation from a frustrating one. Here is what to gather and check before you dig a single inch of soil.
Tools and Materials
- Pipe trencher or flat spade shovel
- PVC pipe cutter or hacksaw
- Pipe glue and primer
- Measuring tape and marking paint or flags
- Backflow preventer
- Sprinkler heads (rotary or fixed, depending on zone type)
- Irrigation controller / timer
- Poly or PVC pipe (typically 1-inch main line, 3/4-inch lateral lines)
- Pipe fittings: elbows, tees, couplings
- Wire connectors and irrigation wire (for electric valves)
- Manifold and zone valves
- Pressure gauge
Check local codes and call 811.
Before breaking ground, call 811 — the national “Call Before You Dig” number in the United States. This free service will mark the location of underground utility lines (gas, electric, water, and cable) on your property. Hitting one of these lines is dangerous and expensive. Also check with your local municipality about permits; some areas require a permit for irrigation work tied to the main water supply.
Step 1 — Measure Your Water Pressure and Flow Rate
Every sprinkler system design starts with two numbers: your static water pressure (measured in PSI) and your flow rate (measured in GPM — gallons per minute). These numbers determine how many sprinkler heads you can run per zone and what pipe size you need.
To measure static pressure, attach a pressure gauge to an outdoor hose bib with all other water off inside the house. A reading between 40 and 65 PSI is ideal for most residential systems. If your pressure is higher than 80 PSI, you will need a pressure regulator to protect your heads and pipes.
To measure flow rate, time how long it takes to fill a one-gallon bucket from that same hose bib, then convert to GPM. For example, if it takes 10 seconds to fill a gallon, your flow rate is 6 GPM. This number caps how many heads you can put on a single zone.
Pro tip: If you are dealing with low water pressure and want to fix it before installing your system, read our guide on how to increase sprinkler water pressure before moving forward.
Step 2 — Design Your Irrigation Layout and Zones
On graph paper or a free online tool, draw your yard to scale. Mark the house, driveway, flowerbeds, trees, and any obstacles. Then identify the different watering zones your yard needs.
Zones separate areas with different water needs. For example, a sunny front lawn, a shaded back lawn, and a drip-irrigated flowerbed should never share a zone because they require different amounts of water and different head types.
Types of Sprinkler Heads by Zone
- Rotary heads (gear-driven): Best for large open lawn areas. They rotate and throw water up to 35 feet.
- Fixed spray heads: Great for smaller lawn areas and groundcover beds. They pop up and spray in a fixed pattern.
- Drip emitters: Used in flowerbeds, shrub areas, and vegetable gardens. They deliver water slowly at the root.
- Rotor heads: Mid-range option for medium-size turf areas.
When laying out heads, use the “head-to-head coverage” rule: each head should reach the next one. This ensures no dry spots in between. Mark head locations on your map with a symbol showing the spray pattern (quarter circle, half circle, or full circle).
Step 3 — Connect to the Water Supply and Install a Backflow Preventer
Your irrigation system ties into your home’s main water supply line, typically near the water meter or where the line enters the house. You will cut into the pipe and install a tee fitting that branches off to your sprinkler system.
This is also where you install the backflow preventer—and this step is not optional. A backflow preventer stops contaminated water from flowing backward into your drinking water supply. In most U.S. states, a backflow preventer is required by code whenever an irrigation system connects to a potable water line. Common types include the pressure vacuum breaker (PVB) and the reduced pressure zone (RPZ) valve.
Note: If you have a wet pipe fire suppression system in your home, be aware that your sprinkler plumbing is a separate system entirely. You can learn more about the wet-pipe sprinkler system if you want to understand how they differ.
Step 4 — Install Zone Valves and the Manifold
Zone valves control the water flow to each section of your yard. Each zone gets its own valve, and all of them are grouped together in a manifold—a compact assembly that is usually installed in a covered valve box buried at the edge of your yard or near the water source.
Use solenoid valves (electrically operated) if you are installing an automatic system with a controller. Each valve has two wires: one connects to the controller’s common terminal and the other to the zone terminal. Use waterproof wire connectors for all underground connections.
Install the valves with the flow arrow pointing in the direction water travels (away from the supply). Hand-tighten fittings, then use pipe wrenches carefully—overtightening can crack valve bodies.
Step 5 — Dig the Trenches
Trenching is the most labor-intensive part of the job. You can rent a mechanical pipe trencher from any major equipment rental store — this is strongly recommended for anything beyond a very small yard. A trencher can cut through grass and soil in a narrow slot without tearing up large sections of your lawn.
Trench depth varies by climate. In warmer regions that do not freeze, 6 to 8 inches is sufficient. In colder climates—like the Midwest or Northeast—you may need to go 12 inches or more to get below the frost line. Check your local frost depth before digging.
For homeowners in colder states planning irrigation projects, see our detailed guide on irrigation system installation in Minneapolis, which covers frost depth, winterization, and freeze protection in detail.
Mark your trench lines with spray paint or string before you dig. Follow the layout map you created in Step 2. Avoid running main lines under concrete or pavement if possible—if you must cross a driveway, you can drive a rigid steel pipe under it using a technique called “boring” rather than tearing up the surface.
Step 6—Lay the pipe and connect the fittings.
Once your trenches are open, it is time to lay pipe. The main supply line running from the manifold to each zone is typically 1-inch PVC or polyethylene pipe. Lateral lines branching off to individual sprinkler heads are usually 3/4-inch.
PVC vs. Poly Pipe
PVC pipe is rigid, durable, and handles high pressure well. It is glued together with PVC cement and primer. It is the standard choice in most parts of the country.
Polyethylene (poly) pipe is flexible, making it easier to snake around obstacles and work in cold weather without cracking. It connects with barbed fittings and clamps. It is common in northern states.
When gluing PVC, apply primer to both the pipe and the fitting, then apply cement quickly and push the pieces together with a slight twist. Hold for 30 seconds. Wait at least 30 minutes before pressurizing the line.
Use tee fittings at each sprinkler head location. Risers — short vertical pipe sections — connect the lateral line to the sprinkler head at the surface. Use flexible swing-joint risers when possible; they absorb impacts from foot traffic and mowing and prevent the head from breaking if it gets bumped.
Step 7 — Install the Sprinkler Heads
Thread or push-connect each sprinkler head onto its riser. Pop-up heads should sit at grade level — the top of the head flush with the soil surface. This protects them from mowing damage and ensures they pop up correctly when the zone runs.
After installation, you will likely need to adjust the arc and radius on each head to match your layout. Most rotary and spray heads have a built-in adjustment screw on top and a radius adjustment on the nozzle itself.
For a detailed walkthrough on setting the spray pattern correctly, read our guide on Rain Bird sprinkler head adjustment.
Step 8 — Install the Irrigation Controller
The irrigation controller (also called the timer or clock) is the brain of your system. It tells each valve when to open, for how long, and how many times per week. Mount the controller inside the garage or in a weatherproof outdoor enclosure, close to an electrical outlet.
Run irrigation wire from the controller to the valve manifold. Each valve connects to its own numbered terminal on the controller, plus a shared “common” wire that connects all valves together. Standard irrigation wire is 18-gauge direct-burial cable.
Modern controllers offer Wi-Fi connectivity, smart scheduling based on local weather data, and app control. Brands like Rain Bird, Hunter, and Rachio make solid options for residential use. A smart controller can save significant water by automatically skipping scheduled runs after rainfall.
According to the EPA’s WaterSense program, switching to a smart irrigation controller can save the average household about 8,800 gallons of water per year.
You can learn more about water-efficient irrigation at the EPA WaterSense program.
Step 9 — Backfill, Test, and Adjust
Before covering your trenches, do a full system test. Turn on each zone from the controller and walk the area. Watch for:
- Leaks at pipe joints or fittings
- Heads that are misaligned, tilted, or spraying onto pavement
- Dry spots that are not being reached by any head
- Puddling or runoff in any area (a sign of too much overlap or poor soil absorption)
- Heads that are not popping up fully (often a pressure issue)
Fix any issues before backfilling. Once you are satisfied with coverage and there are no leaks, carefully push the excavated soil back into the trenches and tamp it down gently. Water the area thoroughly to help the soil settle. Your lawn will recover within a couple of weeks.
Step 10 — Program Your Watering Schedule
With the system running and tested, set up your watering schedule on the controller. A few general rules for U.S. homeowners:
- Water in the early morning (4 AM to 8 AM) — this reduces evaporation and gives the grass time to dry before evening, which prevents fungal disease.
- Most lawns need about 1 to 1.5 inches of water per week, including rainfall.
- Divide the total watering time across two or three days rather than one long session—this allows water to soak in instead of running off.
- Use shorter, more frequent cycles on slopes to prevent runoff.
- Adjust your schedule seasonally — more in summer heat, less in spring and fall.
Seasonal Maintenance Tips
A sprinkler system is not a set-it-and-forget-it investment. A little seasonal maintenance keeps it running efficiently for years.
Spring Startup
- Inspect heads for winter damage or settling
- Check valve boxes for debris or pest nests
- Slowly pressurize the system—do not open the main valve all at once.
- Run each zone manually and inspect coverage
Fall Winterization (Critical in Freezing Climates)
In states where temperatures drop below 32°F, you must blow out the system with an air compressor before the first hard freeze. Attach the compressor to the blow-out port (if your system has one) or a hose bib and run each zone for 1 to 2 minutes until no water comes out of the heads. Do not skip this step — water left in pipes will freeze, expand, and crack your pipes and heads.
For region-specific watering guidance, the University of Minnesota Extension’s lawn watering guide is an excellent resource for northern homeowners.
Common Mistakes to Avoid
- Skipping the water pressure test: Designing a system without knowing your actual PSI leads to either underperforming heads or blown fittings.
- Mixing head types on one zone: Rotary heads and fixed spray heads have very different precipitation rates. Mixing them creates uneven watering.
- Not calling 811: Digging without marking utilities is dangerous and potentially expensive.
- Poor head placement: Heads too far apart create dry spots. Always use head-to-head spacing.
- Ignoring soil type: Sandy soil drains fast and needs more frequent, shorter watering cycles. Clay soil absorbs slowly and can puddle easily.
- No backflow preventer: In most U.S. municipalities, this is a code requirement — and it protects your family’s drinking water.
Final Thoughts on Installing a Sprinkler System
Installing a sprinkler system is one of the most rewarding home improvement projects you can do for your yard. Once you complete it, you never have to think about watering again—the system takes care of it automatically, rain sensor and all. The upfront work pays off in a consistently green lawn, lower water bills, and time back in your schedule.
Take the process one step at a time. Start with your pressure and flow numbers, design your zones carefully, and do not rush the testing phase. If you hit any issues along the way—whether it is low pressure, misfiring heads, or a zone not triggering—most problems have straightforward fixes once you know what to look for.
Have questions about a specific part of your setup? Browse the rest of HydroSprinkler.com for more guides, tips, and troubleshooting help built specifically for U.S. homeowners.
Frequently Asked Questions
How long does it take to install a sprinkler system?
For an average-sized yard (5,000 to 10,000 square feet), a DIY installation typically takes one to three weekends, depending on your experience and the complexity of the layout. Renting a mechanical trencher significantly cuts down digging time.
How much does it cost to install a sprinkler system yourself?
DIY installation typically costs between $500 and $1,500 for materials on a standard residential lawn, compared to $2,500 to $5,000+ for professional installation. Costs vary based on yard size, number of zones, and the quality of heads and controllers you choose.
Do I need a permit to install a sprinkler system?
Permit requirements vary by city and county. Many U.S. municipalities require a permit when tapping into a potable water main. Contact your local building department before starting to confirm what is required in your area.
How many zones does my yard need?
The number of zones depends on your yard’s square footage, water pressure, and the different plant types in your landscape. A typical residential yard of 5,000 to 8,000 square feet might need three to five zones. Larger properties or yards with mixed plant types (lawn, shrubs, flowers) will need more.
Can I install a sprinkler system without digging up my whole lawn?
Mostly, yes. A mechanical trencher creates a narrow slot that closes back up well after backfilling. Within a few weeks of watering, the grass fully grows back over the trench line, and you cannot tell it was disturbed. Avoid installing in peak summer heat when the lawn is already stressed.