
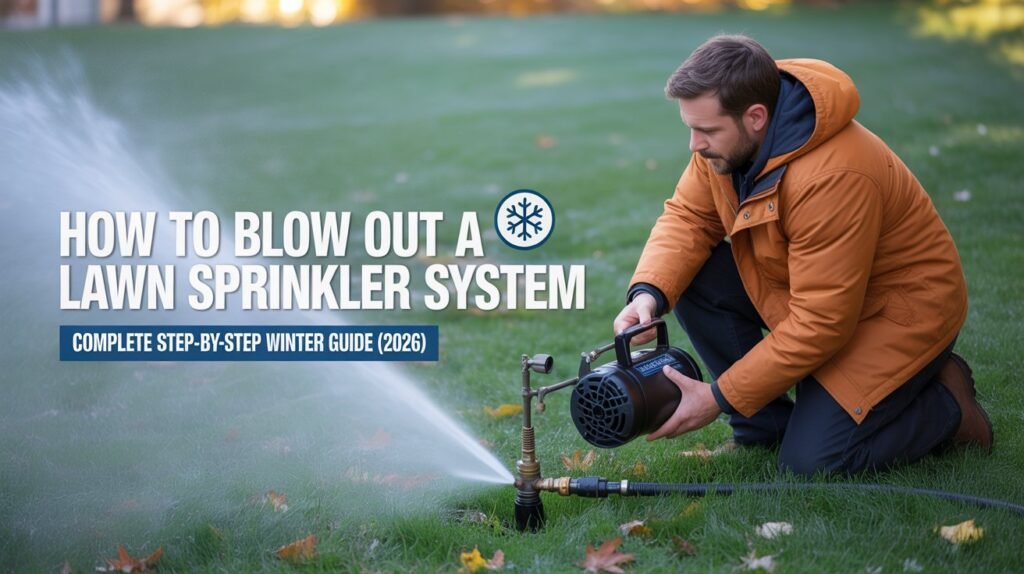
Why You Need to Blow Out Lawn Sprinkler System Pipes Before the First Freeze
Learning how to blow out lawn sprinkler system pipes correctly is the difference between routine fall maintenance and a cracked-pipe repair bill come spring. The weather app just flagged a hard freeze for tonight, and your sprinkler system is still full of water from last week’s cycle — that gap between “I should winterize soon” and “I actually did it” is exactly where pipe damage happens.
Quick Answer: Blowing out a sprinkler system means using compressed air to force all residual water out of the pipes before freezing temperatures arrive. Set your air compressor to 40–50 PSI for PVC pipe or 50–80 PSI for poly pipe, clear one zone at a time for 1–2 minutes each, and never exceed 80 PSI on a residential system regardless of pipe type.
Table of Contents
Why Leftover Water Destroys Sprinkler Systems
Water is one of the few common substances that expands as it freezes — roughly 9% in volume. Inside a rigid PVC pipe, that expansion has nowhere to go, so the pipe wall takes the pressure instead. The result is a hairline crack that you won’t discover until you turn the system back on in spring and water sprays out of a joint that was fine last October.
The same physics applies to valves, backflow assemblies, and sprinkler heads. Any component holding standing water when the temperature drops below freezing is a candidate for a crack, and underground cracks are the expensive kind — they mean digging before you can even diagnose the full extent of the damage.
This is exactly why winterization matters more in some climates than others. If you’re in a region with real winters, pair this guide with our full walkthrough on how to winterize a sprinkler system, which covers the rest of the seasonal shutdown beyond just the blowout step.
What “Blowing Out” Actually Means
Blowing out a sprinkler system means connecting an air compressor to the system and using compressed air to physically push every drop of remaining water through the pipes and out the sprinkler heads. It’s different from simply draining the system by gravity, because air pressure reaches water sitting in low points and dead ends that gravity alone won’t clear.
The Irrigation Association — the industry’s primary professional body for irrigation standards and training — lists proper seasonal winterization as a core maintenance practice for any system in a freeze-prone climate, precisely because the alternative (skipping it) is one of the leading causes of preventable irrigation repairs.
If your system hasn’t been blown out before, it helps to first understand how to use a sprinkler irrigation system so you’re comfortable running zones manually — you’ll need to do exactly that during the blowout process.
Tools You’ll Actually Need
Skip the guesswork on equipment. Here’s what a proper blowout requires:
- Air compressor rated for at least 10–20 CFM for a typical residential system (CFM — cubic feet per minute — matters more than raw PSI for actually clearing water, since it’s the volume of airflow that pushes water through the pipe, not just the pressure behind it)
- A blowout adapter that connects your compressor hose to the system’s blowout port, usually located near the backflow preventer
- A pressure regulator, separate from whatever regulator is built into your compressor, so you can dial in an exact PSI rather than relying on a single fixed setting
- Safety goggles — non-negotiable, since debris and moisture can spray back at the connection point
- Work gloves, optional but useful when handling cold metal fittings in late fall
A small pancake compressor from a hardware store often can’t sustain enough CFM for anything beyond a single small zone. If you’re only equipped with one of those, plan on a longer process with more rest time between zones, or consider hiring a professional instead.
Before you connect anything, it’s worth confirming your backflow preventer is the type you think it is — some assemblies need to be manually drained and stored indoors over winter regardless of whether the rest of the system gets blown out with air.
Step-by-Step: The Actual Blowout Process
Step 1 — Shut Off the Water Supply
Close the main valve feeding your irrigation system. This has to happen before you introduce compressed air, or you’ll be fighting incoming water pressure the entire time.
Step 2 — Close the Backflow Preventer
Shut the backflow valve so water can’t creep back into the lines once you start clearing them. Leave the test cocks partially open if your assembly has them, since this lets any trapped water drain rather than sitting under pressure.
Step 3 — Connect the Compressor
Attach your air hose to the blowout port using the correct adapter. Check that the connection is snug — a loose fitting here just means air escapes at the connection instead of doing its job downstream.
Step 4 — Dial In the Right PSI
This is where most DIY blowouts go wrong. Set your regulator based on your pipe material — see the table below — and never simply crank the compressor to its maximum output. A pipe that’s fine at 50 PSI can split at 90.
Step 5 — Run One Zone at a Time
Manually activate a single zone from your controller and let air push through it. Watch the heads: you’ll see a burst of water first, then a misty spray, and finally clean air with no visible moisture. That’s your signal the zone is clear — typically 1–2 minutes per zone, though larger zones with more heads can take longer.
Step 6 — Move Through Every Zone in Sequence
Repeat Step 5 for each remaining zone. Resist the temptation to activate two zones simultaneously to save time — doing so splits your compressor’s airflow between them, and neither zone gets fully cleared as a result.
Step 7 — Disconnect and Store
Once every zone runs clean, turn off the compressor, disconnect the hose, and leave zone valves slightly open for the winter so any residual moisture has somewhere to escape rather than sitting sealed in the line.
Timing note: never hold continuous air pressure on a single zone for more than about 2 minutes. Short controlled bursts give water time to work its way out gradually. Sustained pressure for longer stretches is what cracks fittings that would otherwise have survived the process just fine.
PSI by Pipe Material — Don’t Guess This Part
| Pipe Material | Safe PSI Range | Why |
|---|---|---|
| PVC (rigid) | 40–50 PSI | Rigid plastic is strong but brittle — it cracks rather than flexes under excess pressure |
| Polyethylene (poly) | 50–80 PSI | Flexible material absorbs more pressure without splitting |
| Older or already-brittle fittings | Start at 20–30 PSI | Age and UV exposure weaken plastic over time; go gentler and increase slowly if needed |
Regardless of pipe type, stay under 80 PSI on any residential system. If you’re unsure which pipe material your system uses, PVC is the safer assumption — the lower end of that range rarely fails to clear a zone, while overshooting the higher poly range on PVC pipe is a fast way to crack a fitting.
For context on pressure limits generally, OSHA’s compressed-air standard (29 CFR 1910.242(b)) caps general-purpose compressed air cleaning at 30 PSI for safety reasons — a useful anchor point for just how much force is actually needed to move air and water through a line, versus how much pressure a system can structurally tolerate.
Mistakes That Turn a Routine Task Into a Repair Bill
- Maxing out the compressor “to be thorough.” More pressure doesn’t clear water faster once you’re past the point of adequate airflow — it just stresses the pipe.
- Running two zones together. Airflow splits, water lingers in both, and you’ve done the work without the result.
- Holding pressure too long on one zone. Short bursts outperform one long, sustained blast.
- Skipping eye protection. Debris and moisture at the connection point can travel farther than you’d expect.
- Using a compressor with insufficient CFM and assuming a longer run time makes up for it. It usually doesn’t — the water at the far end of a zone often stays put.
Signs a Zone Wasn’t Fully Cleared
Even a careful blowout occasionally misses a zone, usually because the compressor lost pressure mid-run or a step got rushed near the end. Watch for these signs once you restart the system in spring:
- A sprinkler head that’s visibly cracked or split at startup — a strong indicator that water was trapped and froze inside it over winter.
- A damp or icy patch above a buried line after a hard freeze, even though you believe that zone was cleared.
- Noticeably lower pressure in one specific zone at spring startup, often pointing to a fitting that cracked from freezing residual water.
If you spot any of these, inspect that zone closely before running it at full pressure — a cracked component under full water pressure can fail suddenly rather than just leak slowly.
Manual Draining: The Fallback Option
If you genuinely don’t have access to a compressor, gravity draining is possible, though it’s the weaker option.
How it works: shut off the water supply, open the system’s manual drain valves, and let gravity pull water out through the lowest points in the system.
Why it falls short: gravity can’t reach water sitting in level or slightly uphill sections of pipe the way compressed air can. In a climate with genuinely hard freezes, that leftover water is still enough to crack a fitting. Manual draining works reasonably well in mild climates with only occasional light frost — it’s a poor substitute for a real blowout anywhere winters get consistently cold.
If you’re weighing which approach fits your climate, our guide on winterizing without a blowout walks through when the gravity-drain method is actually a reasonable choice.
How Long the Whole Process Takes
- Small system (1–4 zones): 20–30 minutes total
- Medium system (5–8 zones): 30–45 minutes total
- Large system (9+ zones): 45–60 minutes total
Each individual zone typically takes 1–2 minutes once air is flowing steadily. The bulk of the time is usually spent moving between zones and confirming each one runs clear, not the blowout itself.
DIY or Call a Professional?
DIY makes sense if: you already own or can rent a compressor with adequate CFM, your system is small to medium sized, and you’re comfortable reading pressure gauges and following the zone-by-zone process without rushing.
Hiring a professional makes sense if: your system is large or has an unusually complex zone layout, you don’t have access to a compressor that can sustain sufficient airflow, or you’d simply rather not risk over-pressurizing a line yourself.
Professional blowout services typically run $40–$80 for a small system, $80–$120 for a medium system, and $120–$200 for a larger one, depending on your region and the number of zones involved. If you’re not confident in your equipment or your read on safe PSI, that service fee is usually far cheaper than a spring repair on a burst fitting.
If you’re setting up a new system rather than winterizing an existing one, start with our guide on how to install a sprinkler irrigation system so you know exactly where your blowout port and zone valves will need to be.
Frequently Asked Questions
How do I know if my sprinkler system is fully blown out? Each zone is clear when only air — no visible water or mist — comes out of every head on that zone. Check every zone individually rather than assuming the whole system is done after one or two zones run clean.
Can I use a small air compressor for this? You can, but a small compressor’s limited CFM often can’t sustain enough airflow to fully clear a zone, especially on larger systems. You may need longer run times and more patience, or a rented higher-CFM unit for anything beyond a small yard.
What actually happens if I skip the blowout entirely? Residual water in the lines freezes and expands, which cracks pipes, valves, and fittings — damage that’s frequently underground and not visible until the system fails at spring startup.
When exactly should I do this? Before your area’s first hard freeze, which usually falls somewhere in mid-to-late fall depending on your climate. Waiting until after a freeze has already happened defeats the purpose.
Is compressed air actually better than just draining the system? Yes, in any climate with real winters. Compressed air clears water from low points and dead ends that gravity draining leaves behind, offering more complete protection against freeze damage.
Should I ever run multiple zones at the same time to save time? No. Doing so splits your compressor’s total airflow across zones, which usually means none of them get fully cleared — you’ll end up redoing the process anyway.
Is it worth paying a professional instead of doing it myself? If you don’t have a properly sized compressor or you’re unsure about reading PSI safely, yes — the service fee is typically a fraction of what a cracked-pipe repair would cost.