
Introduction
Building sprinkler system projects have become one of the most popular DIY upgrades among US homeowners in 2026, and for good reason. A healthy, green lawn doesn’t happen by accident — it happens because someone took the time to water it properly. If you’re tired of dragging a garden hose across your yard every evening, building your own system is one of the smartest home upgrades you can make. It may sound technical, but with the right planning and materials, it’s a project most homeowners can complete over a couple of weekends. Not only does it save time, but a well-designed system also reduces water waste and keeps every corner of your lawn evenly hydrated.
In this guide, we’ll walk you through everything you need to know about building a sprinkler system — from planning your layout to installing pipes, valves, and sprinkler heads — so you can get professional-level results without paying for a full professional installation.
Table of Contents
Why Build Your Own Sprinkler System?
Building your own in-ground or above-ground sprinkler system gives you full control over your budget, layout, and long-term maintenance. Homeowners who install their own systems typically save thousands of dollars compared to hiring a contractor, and the process has become much easier thanks to modern kits, flexible tubing, and smart controllers available in 2026.
That said, building a sprinkler system isn’t just about digging trenches and connecting pipes. It requires understanding your yard’s water pressure, soil type, and zoning needs. If your project involves complex layouts or you’re unsure about local code requirements, it may be worth comparing your plan with a professional first—our guide on lawn sprinkler system contractors breaks down when hiring help makes sense versus doing it yourself.
Step 1: Plan Your Sprinkler System Layout
Before you buy a single pipe, sketch your yard on paper. Mark:
- The water source (usually your home’s main line or an outdoor spigot)
- Areas with different sun exposure (these need different watering zones)
- Slopes, garden beds, and hardscaping like patios or driveways
- Any obstacles such as trees, sheds, or fences
Divide your yard into watering zones based on plant type and sun exposure. Grass, flower beds, and shrubs all have different watering needs, so grouping them separately prevents overwatering or underwatering any single area.
Calculate Your Water Pressure and Flow
Water pressure determines how many sprinkler heads each zone can support. Too many heads in one zone and your system will struggle. You can test your home’s pressure with a simple pressure gauge attached to an outdoor faucet. If you find your pressure is inconsistent across zones, check out our article on improving water pressure for practical fixes before you start building.
Step 2: Choose the Right Materials
A durable sprinkler system depends on quality components. Here’s what you’ll typically need:
| Component | Purpose | Notes |
|---|---|---|
| PVC or polyethylene pipe | Main water lines | PVC is rigid and durable; poly pipe is flexible for tricky yards |
| Backflow preventer | Stops contaminated water from re-entering supply | Often required by local plumbing codes |
| Anti-syphon valves | Prevents backflow at each zone | See our anti-syphon valve guide for sizing tips |
| Zone valves | Controls water flow to each zone | Compare options in our valves for sprinkler systems guide |
| Sprinkler heads | Distributes water | Pop-up heads for lawns, rotor heads for larger areas |
| Controller/timer | Automates watering schedule | Smart Wi-Fi controllers are now standard in 2026 builds |
Buying quality valves and heads upfront saves you from costly repairs later. Cheap plastic fittings tend to crack under pressure changes, especially in regions with hot summers and cold winters.
Step 3: Install the Main Water Line
Once your layout and materials are ready, connect your system to the main water supply. This usually involves:
- Installing a backflow preventer close to the water source
- Running the main line underground to a central valve manifold
- Attaching zone valves that will control water flow to each section of the yard
Most local codes require the backflow preventer to be installed correctly to protect drinking water. If you’re unsure about compliance, the EPA WaterSense program offers guidance on water-efficient irrigation setups that also meet safety standards.
Step 4: Dig Trenches and Lay Pipes
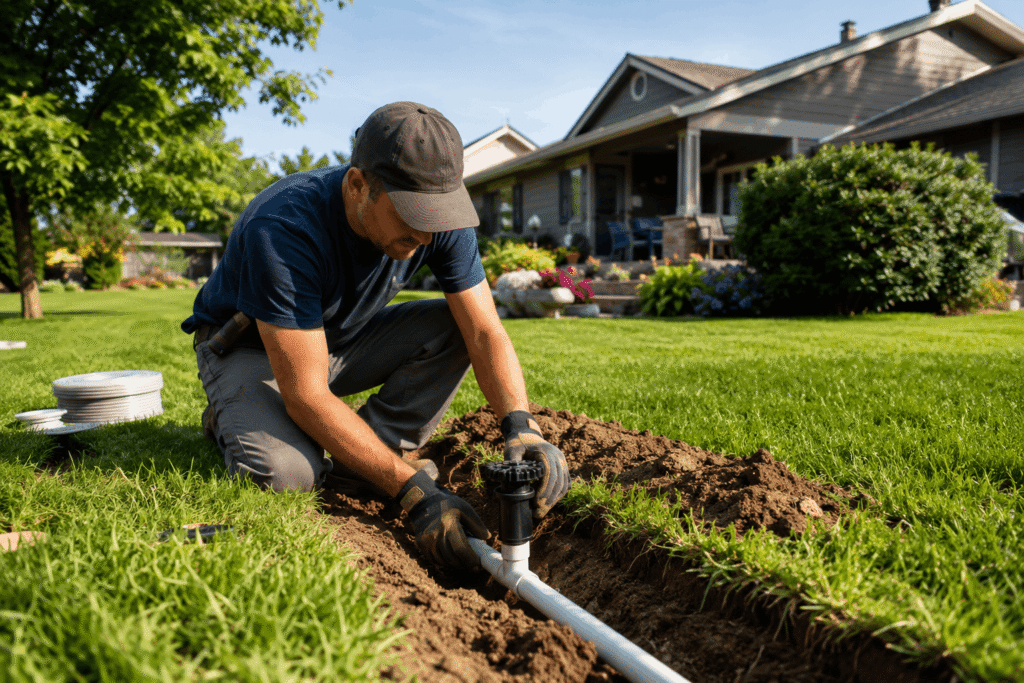
Trenches for residential sprinkler systems are typically 6 to 12 inches deep, depending on your local frost line and code requirements. A trenching tool or rented trencher speeds this process up significantly compared to digging by hand.
Lay your pipes according to your zone map, connecting each zone valve to its designated sprinkler heads. Keep pipe runs as straight as possible to reduce pressure loss, and use fittings to navigate around obstacles rather than forcing sharp bends.
Placing Sprinkler Heads Correctly
Space sprinkler heads so their spray patterns overlap slightly—this is called “head-to-head coverage,” and it’s the industry standard for even watering. Skipping this step is one of the most common reasons DIY systems end up with dry patches. Once heads are installed, they often need periodic adjustment; our guide on Rain Bird sprinkler head adjustment explains how to fine-tune spray direction and distance after installation.
Step 5: Connect the Controller and Test the System
With pipes and heads in place, connect your zone valves to the irrigation controller. Modern smart controllers let you schedule watering based on weather data, soil moisture, and even local watering restrictions—a feature increasingly required in drought-prone US states.
Before backfilling your trenches, run each zone manually to check for:
- Leaks at pipe joints
- Proper head-to-head coverage
- Correct rotation on rotor heads
- Consistent pressure across all zones
Only cover the trenches once you’re confident everything works as expected. It’s far easier to resolve a problem while the pipes are still exposed.
How Much Does It Cost to Build a Sprinkler System?
Costs vary widely based on yard size, terrain, and materials chosen. DIY installations generally cost significantly less than hiring a contractor, since labor makes up a large portion of professional quotes. If you want a detailed cost breakdown for underground systems specifically, our guide on underground sprinkler system cost walks through pricing by zone count and pipe material.
Building your own system typically costs less upfront, but factor in tool rentals (trenchers, pipe cutters) and the time investment, especially for larger yards with multiple zones.
Common Mistakes to Avoid When Building a Sprinkler System
- Skipping the pressure test: Installing heads without checking pressure leads to weak or uneven spray.
- Ignoring local codes: Many municipalities require backflow prevention devices; skipping this can result in fines or unsafe water systems.
- Overcrowding zones: Too many heads per zone strains your water pressure and shortens system lifespan.
- Poor trench depth: Pipes buried too shallow are prone to freeze damage or lawn mower damage.
- Not using check valves on sloped yards: Without them, low-elevation heads can leak water even when the system is off.
Maintaining Your New Sprinkler System
Once your system is built, seasonal maintenance keeps it running efficiently for years. This includes winterizing before frost, adjusting heads as landscaping changes, and checking valves for wear. The Irrigation Association publishes updated best practices each year for residential system upkeep, which is a useful reference alongside your builder’s manual.
Frequently Asked Questions
How long does it take to build a sprinkler system?
For an average residential yard, DIY installation typically takes one to three weekends, depending on yard size and how many zones you’re installing.
Do I need a permit to build a sprinkler system?
Many US municipalities require a permit, especially for connections to the main water line or backflow prevention devices. Check with your local building department before starting.
What is the best pipe material for a sprinkler system?
PVC pipe is common for main lines due to its rigidity and durability, while flexible polyethylene pipe is often preferred for lateral lines in yards with rocks, roots, or tight turns.
Can I build a sprinkler system without digging trenches?
Yes, above-ground drip and soaker hose systems are a low-cost alternative, though they generally don’t offer the same even coverage or durability as an in-ground system.
How many zones does my yard need?
This depends on your yard’s size, water pressure, and plant variety. Most residential yards need between 3 and 8 zones for even coverage.
Final Thoughts
Building a sprinkler system is a rewarding weekend project that pays off in water savings, a healthier lawn, and years of convenience. By planning your layout carefully, choosing quality materials, and following the correct installation steps, you can achieve results that rival a professional installation — at a fraction of the cost.
Whether you’re just getting started or fine-tuning an existing setup, HydroSprinkler has detailed guides on every part of the process, from valve selection to sprinkler head adjustment, to help you build a system that keeps your lawn green for years to come.